


Understanding Breast Implant Surgery: A Step-by-Step Guide
If you’re considering breast augmentation, understanding the breast implant procedure steps is essential for setting realistic expectations and preparing properly. Here’s a quick overview of what happens during the procedure:
- Anesthesia administration – Either general anesthesia or intravenous sedation
- Incision creation – Through one of several possible locations (inframammary fold, periareolar, transaxillary, or transumbilical)
- Implant placement – Either submuscular (under the pectoral muscle) or subglandular (behind breast tissue)
- Incision closure – Using layered sutures and surgical adhesives
- Recovery monitoring – Immediate post-operative care and observation
Breast implant procedure steps involve careful planning and precise execution to achieve natural-looking results that complement your body proportions. The procedure typically takes between 1-2 hours to complete, and is performed as an outpatient procedure, meaning you can return home the same day.
The decision to undergo breast augmentation is personal and should be made for yourself, not to fulfill someone else’s desires or to try to fit an ideal image. When performed by a qualified plastic surgeon, breast augmentation is a safe procedure with high satisfaction rates.
I’m Dr. Thomas Jeneby, and I’ve successfully performed over 9,000 breast improvement procedures during my 19+ years of experience, perfecting the breast implant procedure steps to ensure optimal results with minimal recovery time. As the only plastic surgeon in San Antonio with Joint Commission Accreditation for Office-Based Surgery Centers, I prioritize your safety throughout every step of the process.
Breast implant procedure steps word roundup:
– Breast augmentation surgery reviews
– saline vs silicone implants
– Breast surgery consultation questions
Understanding Breast Implant Procedure Steps

When it comes to enhancing your figure, breast augmentation stands as one of America’s most popular cosmetic procedures. With about 3.5 million Americans currently having breast implants, you’re certainly not alone if you’re considering this life-changing surgery.
The journey through breast implant procedure steps begins well before you ever change into a surgical gown. It starts with that first phone call to our San Antonio or Austin office to schedule your consultation – the true beginning of your change.
During your initial visit with Dr. Jeneby, we’ll have an honest conversation about your goals and expectations. Think of this meeting as getting to know each other – you’ll share what you’re hoping to achieve, and we’ll discuss how we can help make that vision a reality.
“I always tell my patients that breast augmentation is deeply personal,” says Dr. Jeneby. “My job isn’t just to perform surgery – it’s to understand what will truly make you happy with your results.”
We’ll carefully evaluate several factors that make your situation unique:
Your current breast tissue and shape (everyone starts from a different place!)
How your chest proportions balance with the rest of your body
What activities fill your day-to-day life (an avid CrossFitter might need different considerations than someone with a desk job)
Most importantly – what you’re hoping to see when you look in the mirror afterward
The science behind breast augmentation has advanced tremendously over the years. According to research published by the National Library of Medicine, modern techniques have significantly improved both safety profiles and aesthetic outcomes compared to procedures from even a decade ago.
At Dr. Jeneby Plastic Surgery, we don’t believe in one-size-fits-all approaches. Your body is uniquely yours, and your surgical plan should be too. Let’s walk through what happens once you’ve decided to move forward with your breast augmentation journey.
Step 1: Anesthesia in Breast Implant Procedure Steps

Your comfort and safety during surgery are our absolute priorities, which is why the first of the breast implant procedure steps focuses on anesthesia. Think of this as the foundation that allows everything else to happen smoothly.
You’ll have two main options when it comes to anesthesia:
General anesthesia puts you completely to sleep during your procedure. You’ll drift off comfortably and wake up when everything is finished, with no memory or sensation of the surgery itself. Many patients prefer this option for the peace of mind it provides.
Intravenous sedation with local anesthesia (sometimes called “twilight sleep”) keeps you in a deeply relaxed state. While you’re technically not fully unconscious, you’ll feel no pain and likely remember very little of the procedure afterward.
“The choice between anesthesia types often comes down to personal preference and medical history,” explains Dr. Jeneby. “We’ll help you understand which option makes the most sense for your specific situation.”
Before your procedure begins, our anesthesia team will carefully check your vital signs and ensure you’re ready for surgery. They’ll place monitoring devices to keep track of your heart rate, blood pressure, and oxygen levels throughout the procedure – like having a dedicated guardian watching over you the entire time.
Once you’re comfortably under anesthesia, we move to the next phase of the breast implant procedure steps: creating the carefully planned incisions that will allow us to place your implants.
Step 2: Incision Options in Breast Implant Procedure Steps

When it comes to breast implant procedure steps, choosing the right incision location is like selecting the perfect entrance – it should provide excellent access while remaining as discreet as possible. Dr. Jeneby will help you understand which option aligns best with your anatomy and goals.
The inframammary fold (IMF) incision is the most popular choice, used in about 70-80% of breast augmentations. This incision is made in the natural crease where your breast meets your chest wall. Once healed, the scar hides nicely in this natural fold, especially when you’re standing. This approach gives your surgeon excellent visibility during the procedure and tends to heal very predictably.
The periareolar incision follows the edge where the darker skin of your areola meets the lighter skin of your breast. Nature creates a perfect camouflage here, as the scar often blends into this natural color transition. However, this technique may potentially affect nipple sensation or future breastfeeding, so we’ll discuss whether this is the right choice based on your future plans.
For those concerned about having any scars on the breast itself, the transaxillary approach creates an incision in the natural fold of your armpit. About 10% of patients choose this option for its ability to keep the breast itself scar-free. While appealing for its discretion, this technique requires specialized equipment and expertise to ensure precise implant placement.
The transumbilical method (TUBA) involves a small incision in your belly button, creating a tunnel up to the breast area. While the idea of having no breast scars is attractive, Dr. Jeneby approaches this technique cautiously. The limited visibility makes precise placement more challenging, and some implant manufacturers may not honor warranties for implants placed this way.
“The incision choice is about balancing several factors,” says Dr. Jeneby. “We consider your anatomy, the implant type you’ve chosen, and how your body is likely to heal. Most importantly, we want an approach that will give you the beautiful results you’re hoping for.”
During your consultation, we’ll take time to explain the advantages of each technique for your specific situation. We might even show you before-and-after photos of patients with similar body types who chose different incision methods, helping you visualize potential outcomes.
Step 3: Implant Placement Methods
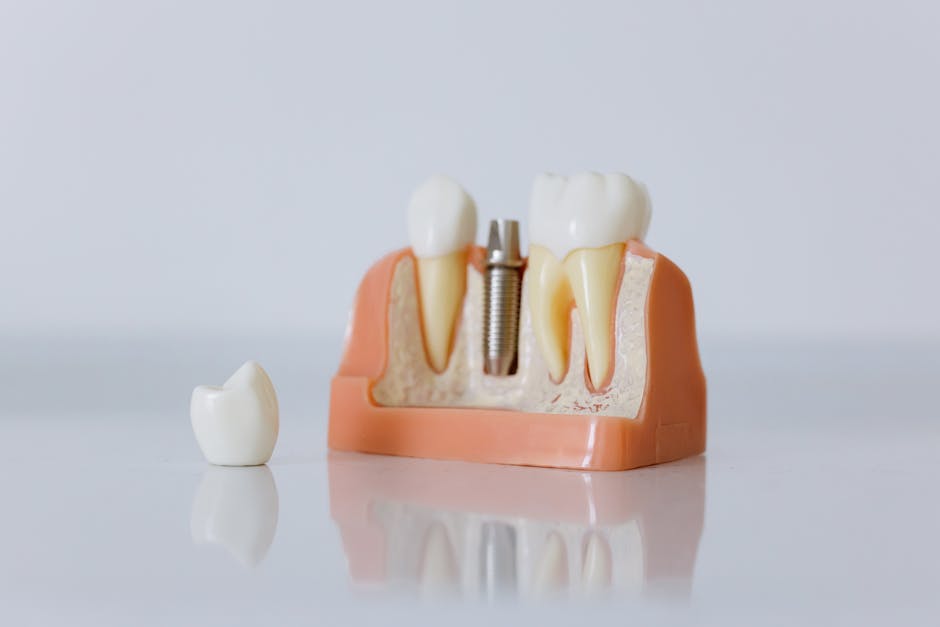
Once the incision is created, we move to perhaps the most transformative of the breast implant procedure steps: creating the perfect pocket for your implant. This decision significantly impacts how your results will look and feel.
There are two main placement options to consider, each with distinct advantages:
| Aspect | Subglandular Placement | Submuscular Placement |
|---|---|---|
| Position | Directly behind breast tissue, above the pectoral muscle | Beneath the pectoral muscle |
| Recovery | Generally less painful with shorter recovery time | More post-operative discomfort with longer recovery |
| Appearance | May provide more dramatic improvement | Often creates a more natural look and feel |
| Mammography | May interfere more with mammogram imaging | Less interference with breast cancer screening |
| Capsular Contracture | Higher risk of capsular contracture | Lower risk of capsular contracture |
| Ideal For | Women with adequate breast tissue to cover the implant | Thin women or those with minimal breast tissue |
“About 75% of the implants I place are submuscular,” Dr. Jeneby explains. “This approach often creates a more natural slope in the upper breast and reduces the visibility of implant edges, especially for women with thinner tissue.”
Submuscular placement means your implant sits partially beneath your pectoral muscle, creating a natural buffer between the implant and your breast tissue. While recovery might be slightly more uncomfortable (think: feeling like you did a really intense chest workout), many women appreciate the long-term benefits of this placement.
Subglandular placement positions the implant directly behind your existing breast tissue but in front of the muscle. This approach often means a quicker, less painful recovery and can be ideal if you have enough natural breast tissue to adequately cover the implant.
During your consultation, Dr. Jeneby will explain which placement might work best for your body type and desired outcome. We’ll consider factors like your natural breast tissue thickness, your typical physical activities, and the type of implant you’ve chosen to help determine the ideal placement for your unique situation.
Step 4: Inserting the Implant
After creating the perfect pocket, we reach a pivotal moment in the breast implant procedure steps: the careful insertion and positioning of your chosen implants. This step requires precision, artistry, and expertise to ensure beautiful, symmetrical results.
Today’s implants offer more options than ever before, each with unique characteristics:
Saline implants feature a silicone shell filled with sterile saltwater solution. FDA-approved for patients 18 and older, these implants have a distinct advantage if rupture occurs – your body safely absorbs the saline solution. With approximately a 7% leak rate, they represent a solid option for many patients.
Silicone gel implants contain a silicone shell filled with silicone gel designed to mimic the feel of natural breast tissue. FDA-approved for patients 22 and older, these implants have become increasingly popular due to their natural feel and lower rippling rate. Modern silicone implants have improved significantly, with just about a 1% leak rate.
Cohesive gel implants (affectionately nicknamed “gummy bear” implants) contain a thicker silicone gel that maintains its shape even if the shell is compromised. Many women choose these for their ability to create a naturally sloped breast profile, particularly in the upper portion of the breast.
“Silicone implants were re-approved by the FDA in November 2006 after extensive safety studies,” notes Dr. Jeneby. “Today, about 70% of my patients choose silicone implants for their remarkably natural feel.”
During your procedure, Dr. Jeneby uses a technique called “blunt dissection” when creating the implant pocket. This approach reduces bleeding and lowers the risk of developing a hematoma compared to using sharp instruments. It’s these kinds of technical details that contribute to better healing and fewer complications.
The FDA recommends periodic monitoring of silicone implants with MRI or ultrasound screening – typically starting 5-6 years after placement and continuing every 2-3 years thereafter. This helps detect “silent ruptures” that might not be immediately noticeable. At Dr. Jeneby Plastic Surgery, we’ll help you understand and plan for this long-term care.
Research published in scientific journals shows that modern implants are more durable than ever, with many lasting 10-20 years or longer without complications. Your results can be enjoyed for many years with proper monitoring and care.
Step 5: Closing the Incisions

The final surgical phase of the breast implant procedure steps involves carefully closing your incisions. While it might seem less dramatic than the earlier steps, the closure technique significantly impacts your healing and final appearance.
Dr. Jeneby approaches incision closure with the same precision and attention to detail as every other aspect of your surgery. Rather than simply “stitching you up,” we use advanced closure methods that promote optimal healing:
Layered suturing is our preferred technique, where we close each tissue layer separately rather than just pulling the skin together. Think of it like properly closing a well-made coat – when every layer aligns correctly, the outer appearance is smoother and more refined. This approach distributes tension evenly across the healing tissues, reducing stress on your skin and resulting in a finer scar.
Subcuticular sutures are placed just beneath the skin’s surface, eliminating the need for visible external stitches. These hidden stitches support your healing skin from underneath, often resulting in a thinner, less noticeable scar. It’s a bit like the difference between visible staples versus hidden seams in fine clothing.
After the sutures are placed, we may apply surgical adhesives or tape for additional support. These materials create a protective barrier over your incision, reducing tension and providing an extra layer of protection against infection.
“Your genetic makeup plays a significant role in how your scars will ultimately look,” explains Dr. Jeneby. “But our advanced closure techniques give you the best possible foundation for optimal healing and minimal scarring.”
Once your incisions are closed, we’ll apply dressings and possibly a surgical support bra or elastic bandage. These supports help minimize swelling and provide gentle compression as your tissues begin healing.
The quality of your final scar depends on several factors we’ll discuss during your consultation. Your genetic predisposition to scarring, whether you smoke (smoking dramatically impairs healing), and how carefully you follow post-operative care instructions all influence your outcome. At Dr. Jeneby Plastic Surgery, we’re committed to guiding you through every step of the healing process for the best possible results.
Recovery and Postoperative Care
After completing all the breast implant procedure steps, your recovery journey begins. Understanding what to expect during this period is essential for a smooth healing process and optimal results.

The first 24-48 hours after your breast augmentation are crucial. You’ll spend some time in our comfortable recovery area where our attentive staff will monitor you before you’re cleared to go home. Someone needs to drive you home and stay with you that first night – this isn’t just a recommendation, it’s an important safety measure we insist on for all our patients.
“That first night, you’ll likely feel some tightness and pressure in your chest area,” explains Dr. Jeneby. “It’s completely normal and actually a good sign that your body is responding to the surgery.”
We’ll provide prescription pain medication to keep you comfortable during these initial days. You’ll also be wearing a special surgical bra or elastic bandage that helps reduce swelling and supports your new breasts as they begin to heal.
During your first week of recovery, rest becomes your best friend, though we do encourage light walking around your home to promote healthy circulation. Sleep on your back with your upper body slightly liftd to minimize swelling and pressure on your chest. This position might take some getting used to, but it significantly improves your comfort and healing.
“I always tell my patients to prepare their recovery space before surgery,” Dr. Jeneby shares. “Have your pillows arranged, your medications within reach, and maybe some good books or shows queued up – because taking it easy is your main job for a while.”
Most of our patients return to desk jobs within 3-7 days, though you’ll need to avoid lifting anything over 5 pounds during this early recovery phase. We’ll schedule a follow-up appointment to check your incisions and make sure everything is healing beautifully.
As you move into weeks 2-6, you’ll notice your swelling and bruising gradually subsiding. This is also when your implants begin what we call “dropping and fluffing” – the natural settling process where they move into their final, more natural-looking position. During this intermediate recovery period, you can gradually increase your activity level, but please continue wearing your supportive bra as recommended and avoid strenuous activities, especially those involving chest muscles.
By 6-8 weeks post-surgery, most patients can resume all normal activities, including their regular exercise routines. Your scars will continue to fade over the next 12 months, and your final results become more apparent as all swelling resolves and implants fully settle into place.
“Recovery generally takes 6 to 8 weeks, although individual healing times may vary,” notes Dr. Jeneby. “Discomfort is usually most significant during the first 3 to 5 days post-surgery, with most patients approaching near full recovery by about 2 months.”
For the best recovery experience, follow all post-operative instructions carefully – they’re customized specifically for your procedure and health needs. Take your medications exactly as prescribed, completing any antibiotics even if you feel better. Stay alert for warning signs like increased pain, unusual swelling, redness, drainage, or fever – call us immediately if you notice these symptoms.
Proper nutrition plays a significant role in healing, so stay hydrated and eat nutritious foods rich in protein and vitamins. Avoid smoking and alcohol as both can significantly impair healing and increase complications. And please, attend all your follow-up appointments – they’re essential for monitoring your progress and addressing any concerns you might have.
Breast implants typically last about 10-15 years, though many women enjoy their results for much longer. Regular check-ups with our team are important for monitoring your implants’ condition over time. We’re committed to your long-term satisfaction and are always here to answer questions about your recovery or results.
For more detailed information about what to expect during your recovery journey, visit our Breast Augmentation Recovery page.
Frequently Asked Questions about Breast Implant Procedure Steps
What are the different types of breast implants available?
When you’re considering breast augmentation, understanding your implant options is essential. At Dr. Jeneby Plastic Surgery, we believe in helping you find the perfect match for your body and goals.
Saline implants remain a popular choice for many of our patients. FDA-approved for women 18 and older, these implants feature a silicone shell filled with sterile saltwater. One advantage is safety—if a rupture occurs (which happens in about 7% of cases), your body simply absorbs the saline solution naturally. They’re generally more affordable than other options, though they may not feel quite as natural as silicone, especially if you have minimal breast tissue to begin with.
“Many of my patients are surprised by how natural modern saline implants can look,” says Dr. Jeneby. “Though they’re not right for everyone, they offer peace of mind for women concerned about silicone.”
Silicone gel implants are the most requested option at our practice, accounting for about 70% of the breast augmentations we perform. FDA-approved for patients 22 and older, these implants contain a cohesive silicone gel that closely mimics the feel of natural breast tissue. With only about a 1% leak rate, they’re incredibly durable. The main consideration is that ruptures can be “silent”—you might not notice if the implant shell breaks—which is why the FDA recommends periodic MRI screenings.
For women seeking the most natural feel with optimal shape retention, cohesive gel implants (often called “gummy bear” implants) offer the latest technology. These implants contain a thicker silicone gel that holds its shape even if the shell is compromised. They’re available in both round and anatomical (teardrop) shapes, with the latter providing more customized contouring for certain body types.
Breast implants aren’t lifetime devices. “The average lifespan of a breast implant is about 10-15 years,” explains Dr. Jeneby, “though many last significantly longer depending on your body and how you care for them.”
During your consultation at our San Antonio office, we’ll help you explore all these options, considering your body type, lifestyle, and aesthetic goals to find your perfect fit.
How should I prepare for a breast augmentation procedure?
Preparing well for your breast augmentation can make a world of difference in your surgical experience and recovery. We’ve helped thousands of women through this process, and we’ve developed a comprehensive preparation timeline to ensure you’re ready for surgery day.
4-6 weeks before surgery, you’ll want to focus on optimizing your health. If you smoke, this is the time to quit—nicotine significantly impairs healing and increases complication risks. We’ll also ask you to complete any medical evaluations we’ve requested and begin building a nutritional foundation for healing with a balanced diet rich in protein and vitamins.
“I always tell my patients that surgery is like running a marathon—your body needs to be properly fueled and in good condition,” Dr. Jeneby often says. “The healthier you are going in, the smoother your recovery will be.”
As you get within 2 weeks of surgery, you’ll need to avoid medications and supplements that can increase bleeding, including aspirin, ibuprofen, and many herbal products. This is also the time to prepare your recovery nest at home—set up a comfortable area with essentials within arm’s reach, fill your prescriptions, and arrange for someone to drive you home and stay with you for at least the first 24 hours after surgery.
The night before your procedure is all about following our specific pre-surgical instructions. You’ll shower with antibacterial soap as directed, avoid eating or drinking anything after midnight, and get a good night’s sleep. Remove all jewelry, nail polish, and makeup—you want to arrive at our surgical center fresh-faced and ready.
On surgery morning, wear loose, comfortable clothing that opens in the front (you won’t want to pull anything over your head after surgery). Leave valuables at home and arrive at our surgical center at your scheduled time, typically about an hour before your procedure.
At Dr. Jeneby Plastic Surgery, we conduct thorough pre-operative assessments that may include a comprehensive medical history review, physical examination, baseline mammogram for patients over 40, and laboratory tests as needed. We’ll also have detailed discussions about your expectations to ensure we’re aligned on goals.
Want to learn more about preparing for your procedure? Visit our detailed guide on Preparing for Your Breast Augmentation for additional tips and information.
What are the potential risks and complications associated with breast implants?
While breast augmentation is one of the most commonly performed and safest plastic surgery procedures, it’s important to understand all potential risks before making your decision. At Dr. Jeneby Plastic Surgery, we believe in transparent communication about both the benefits and possible complications.
Like any surgery, breast augmentation carries general surgical risks including infection, bleeding, and reactions to anesthesia. Most of these are rare and treatable, especially when your surgery is performed by a board-certified plastic surgeon in an accredited facility like ours.
More specific to breast implants are risks like capsular contracture—a condition where the scar tissue that naturally forms around your implant begins to tighten and harden. This occurs in about 5-10% of patients and may require additional surgery if severe. You might also experience changes in nipple or breast sensation, though these are often temporary.
“During your consultation, we’ll discuss your individual risk factors based on your health history and chosen implant type,” explains Dr. Jeneby. “For example, we know that about 10% of implants experience rupture or leakage within the first decade, and implant shifting occurs in roughly 7% of patients.”
A concern that’s received significant attention is Breast Implant-Associated Anaplastic Large Cell Lymphoma (BIA-ALCL)—a rare type of lymphoma that can develop in the scar tissue surrounding breast implants. It’s most commonly associated with textured implants, which is why many surgeons, including our team, have moved predominantly to smooth implants. The FDA continues to monitor this issue closely, and you can review their latest findings on their official resource page.
Some patients also report symptoms collectively referred to as Breast Implant Illness (BII), including fatigue, joint pain, memory problems, and others. While not officially recognized as a medical diagnosis, we take these reports seriously and discuss them as part of our comprehensive consultation process.
To minimize these risks, our practice:
– Uses only FDA-approved implants from reputable manufacturers
– Employs meticulous surgical technique with careful attention to sterility
– Provides detailed pre- and post-operative care instructions
– Recommends regular follow-up appointments to monitor your implants
While complications can occur, the vast majority of our patients experience trouble-free recoveries and are delighted with their results. During your consultation, we’ll take time to address all your questions and concerns about the breast implant procedure steps and potential risks based on your unique situation.
Conclusion
Understanding the breast implant procedure steps is essential for anyone considering breast augmentation. From the initial consultation through recovery, each step plays a crucial role in achieving beautiful, natural-looking results that improve your confidence and self-image.

When I talk with my patients about breast augmentation, I often see a mix of excitement and nervousness. That’s completely normal! After all, this is a significant decision that can transform not just your appearance, but often how you feel about yourself.
At Dr. Jeneby Plastic Surgery, we walk beside you through every phase of your breast improvement journey. Our team of board-certified surgeons combines technical expertise with a genuine artistic touch to create results that look natural and complement your unique body shape.
What I’ve found most important throughout my years of practice is that personalized planning makes all the difference. Your specific anatomy, lifestyle needs, and aesthetic goals all influence how we approach your procedure. No two breast augmentations are exactly alike because no two patients are exactly alike.
You have multiple options at every stage – from anesthesia choices to incision placement, implant type, and placement technique. These aren’t decisions you’ll make alone; we’ll partner with you, explaining the benefits of each choice for your specific situation in clear, straightforward terms.
Recovery is gradual. While most of my patients return to their normal activities within 6-8 weeks, your body continues to adjust and your final results develop over several months. Patience during this time is important – your body is healing and adapting to create the beautiful results you’re looking for.
One thing I always emphasize is the importance of long-term follow-up. Your relationship with us doesn’t end when your surgery is complete. Regular check-ins help us monitor your implants and address any concerns that might arise over time.
Breast augmentation remains one of the most frequently performed and highly satisfying plastic surgery procedures available today. When performed by a qualified surgeon following proper breast implant procedure steps, it provides beautiful results that can last for many years.
If you’re considering breast augmentation in San Antonio or Austin, I invite you to come in for a consultation. Our warm, welcoming team will guide you through each step, ensuring you feel informed, comfortable, and confident about your decision.
The journey to feeling more confident in your own skin starts with understanding what to expect and finding a surgical team that truly cares about both your safety and satisfaction.
Learn more about our Breast Augmentation services or schedule your consultation today.


